
i include all the simple info on my labels: name of the quilt, my name (designed/pieced/quilted by me), and the month and year it was completed as well as my town. i have a 'notebook' where i keep all the nitty gritty details. i tend to get a little fancy-pancy with them....
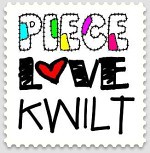
the quilt show is this september, so i worked on some labels today. excuse the roughness- this is what they look like before i applique them to the back. i'll include the link if i have one to go look at the quilt...

i think i might try to have it look like a sign over the driveway of a ranch and put the info under it...i like that idea better! hindsight is 20/20

footnotes. i LOVE the feet...

remember my light switch??? that was the inspiration for this label...

here's a quick how-i-do-this explanation:
i draw out the label on paper to get it 'perfect'. i iron freezer paper to the back of a piece of Kona Cotton white, then trace my drawing onto the fabric. the freezer paper helps stabilize the fabric. then i color the image. (you don't have to be 'artsy' to add a cute drawing to your label- you can use clip art to find an image.) i use a bunch of different coloring things- crayons, oil pastels, sharpies, fabric markers....what ever it takes to get the look i want. then i heat set with a dry iron. the light pencil mark you see is the edge i needle turn to when i applique it down. here's my smarty-pants moment- i found out that rounded edges, ovals and circles are better then squares....the corners are easier cause there are none! :) i wash the quilt before i attach the label. past experience has taught me that the shrinkage of the quilt will distort the label to the point of being unreadable- it gets really poofy. i'll discreetly add the quilt size (in inches) later. that way i don't have to measure it every time. i write my name directly on the backing fabric before i sew on the label...if i'm worried that the backing fabric will shadow through the label, i add a layer of a lightweight, fusible interfacing.
label your quilts....i dunno 'bout you, but my brain's getting full and it's getting harder to remember all the details...i had to use my blog to go look up the completion months...


Girl, you should have contacted me for graphics...I am sending you a pdf of "ranchy" graphics. Even a crooked s branding iron! Hope one of them inspired you. And label every quilt.
ReplyDeleteSo here's the deal. From now on you can make all of my labels!
ReplyDeleteGreat labels and great advice.
ReplyDeleteI am trying to be better about labels... My old brain can't recall the facts anymore... LOL! Your labels are FUN! I always like a good hand written label... more personal... ;-) love those feet!
ReplyDeletethe ''blockhead'' label reads ''made by Blockhead Shannon Baker'' to me, LOL. I think I'd change it to the name of the quilt is situated in another spot maybe?
ReplyDelete